When replacing a Knorr-Bremse EAC (Electronic Air Control) module on a commercial vehicle—commonly found on Volvo and Renault trucks—it’s critical to understand that the new module won’t function until it has been properly programmed.
Our informative guide walks you through how to do just that using Knorr-Bremse Diagnostics, an essential software add-on available through Jaltest.
Why Programming Is Necessary
The EAC+ module is responsible for managing air treatment and pressure regulation in the vehicle’s braking and pneumatic systems. Since each commercial vehicle has unique parameters and configurations, a replacement module must be programmed to communicate with the vehicle’s onboard systems.
Failing to program the EAC+ correctly can result in:
-
Fault codes that won’t clear
-
Improper air system performance
-
Vehicle immobilisation in some cases
Jaltest – The Only Tool for the Job
Knorr-Bremse Diagnostics is an OEM-developed diagnostic suite integrated as an add-on for the Jaltest multi-brand diagnostic tool. It’s currently the only tool capable of fully programming EAC1+ modules, offering unmatched compatibility and reliability.
Because the software is developed by Knorr-Bremse themselves, there’s minimal risk of corrupting the ECU or introducing unsupported parameters during the programming process—something that can happen with non-OEM tools.
Compatibility Note: EAC+ modules are commonly used in Volvo and Renault commercial vehicles. For a complete list of compatible vehicle models and module references, please CLICK HERE.
Step-by-Step Guide: Programming a Knorr-Bremse EAC+ Module
Below is a simple step-by-step guide on how to program your replacement EAC+ system using the Knorr-Bremse Diagnostics add-on within the Jaltest software environment. Please note, this example uses a Volvo FL truck:
Tools Required:
-
Jaltest Diagnostic Tool
-
Knorr-Bremse Diagnostics add-on license
-
USB or Bluetooth interface
-
Stable internet connection (for initial module recognition)
-
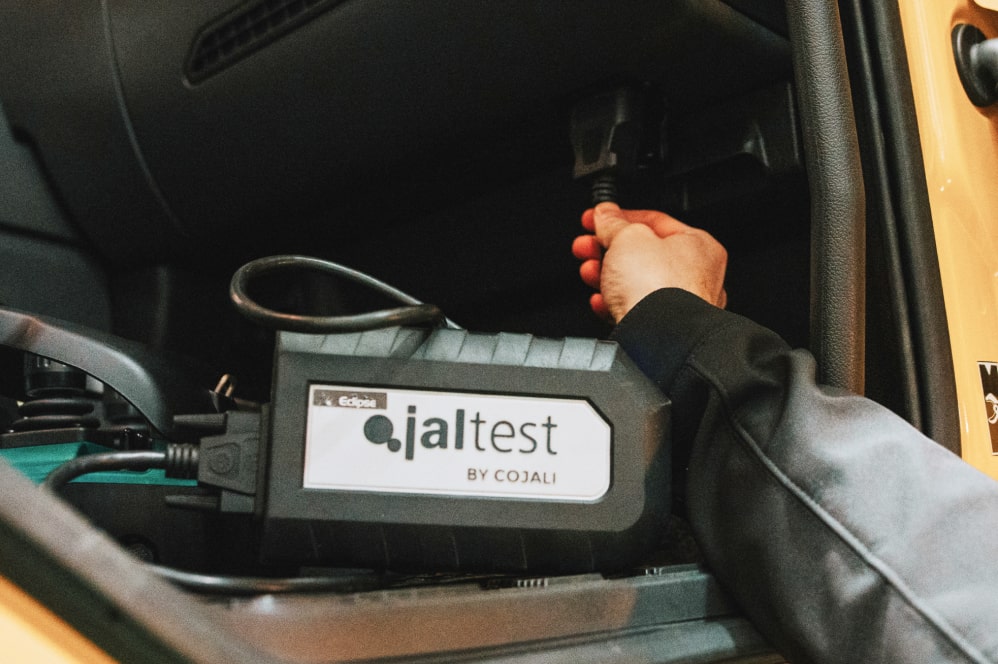
Replacement EAC+ module already installed
Before you begin, make sure the old EAC module is still connected to the vehicle (so that the data can be read off of the current control unit, which will then be used to copy to the new one):
- Having connected to the vehicle in the Jaltest software, under system selection, select the EAC system and click “connect”.
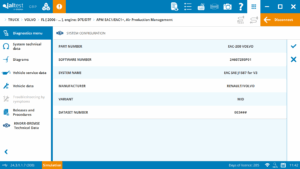
- The software will then show you the specifications of the part. Click the “tick icon” to go to the next page.
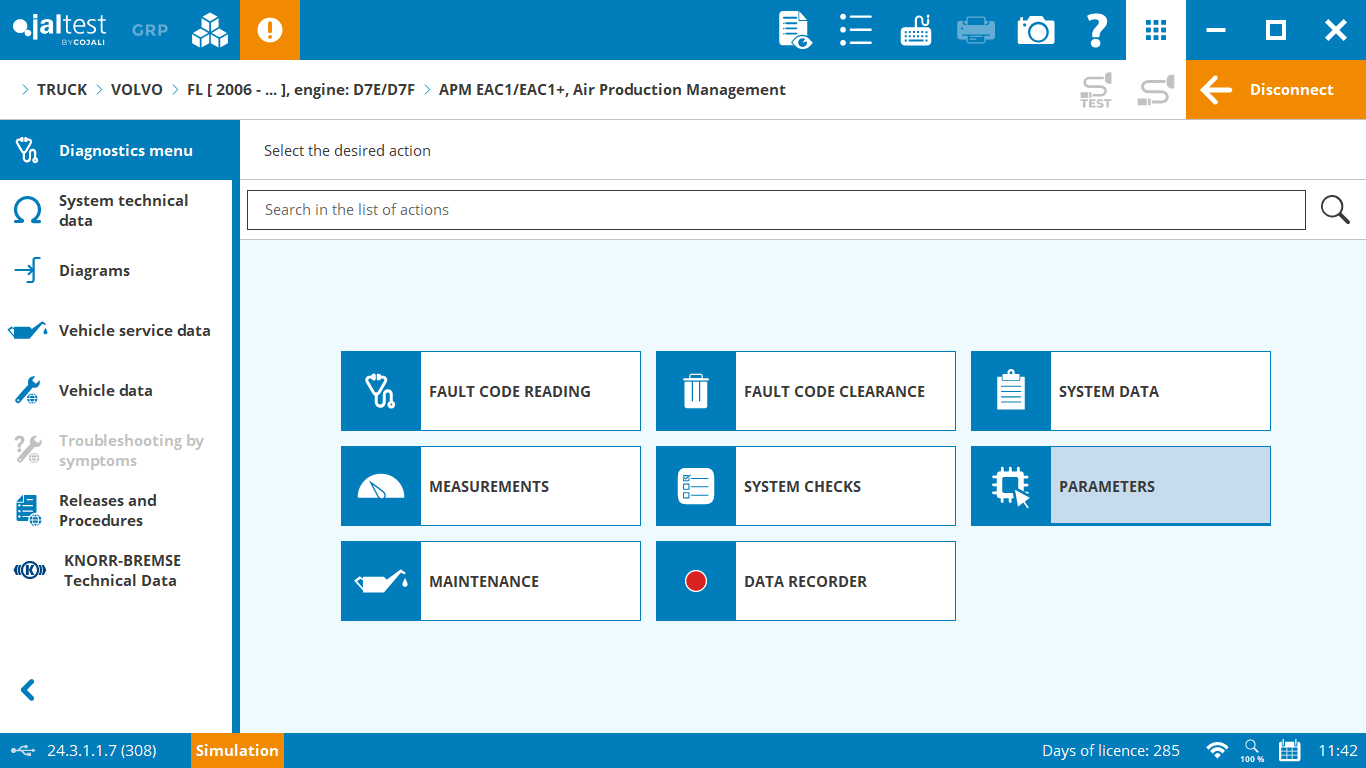
- On the Diagnostics Menu, click “parameters”.
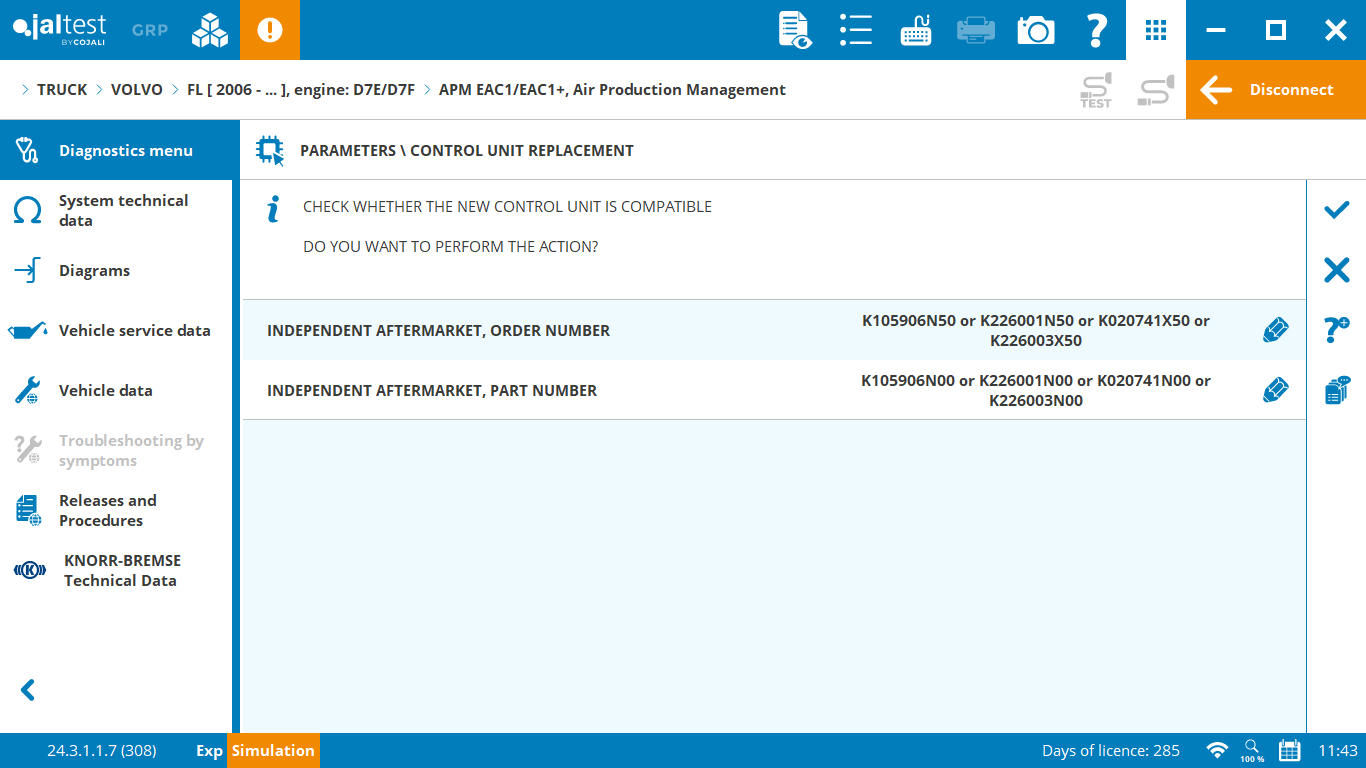
- And then “Control Unit Replacement”.
- Make sure your new control unit is compatible by referring to the part numbers given on-screen and if compatible, click the “tick icon”.
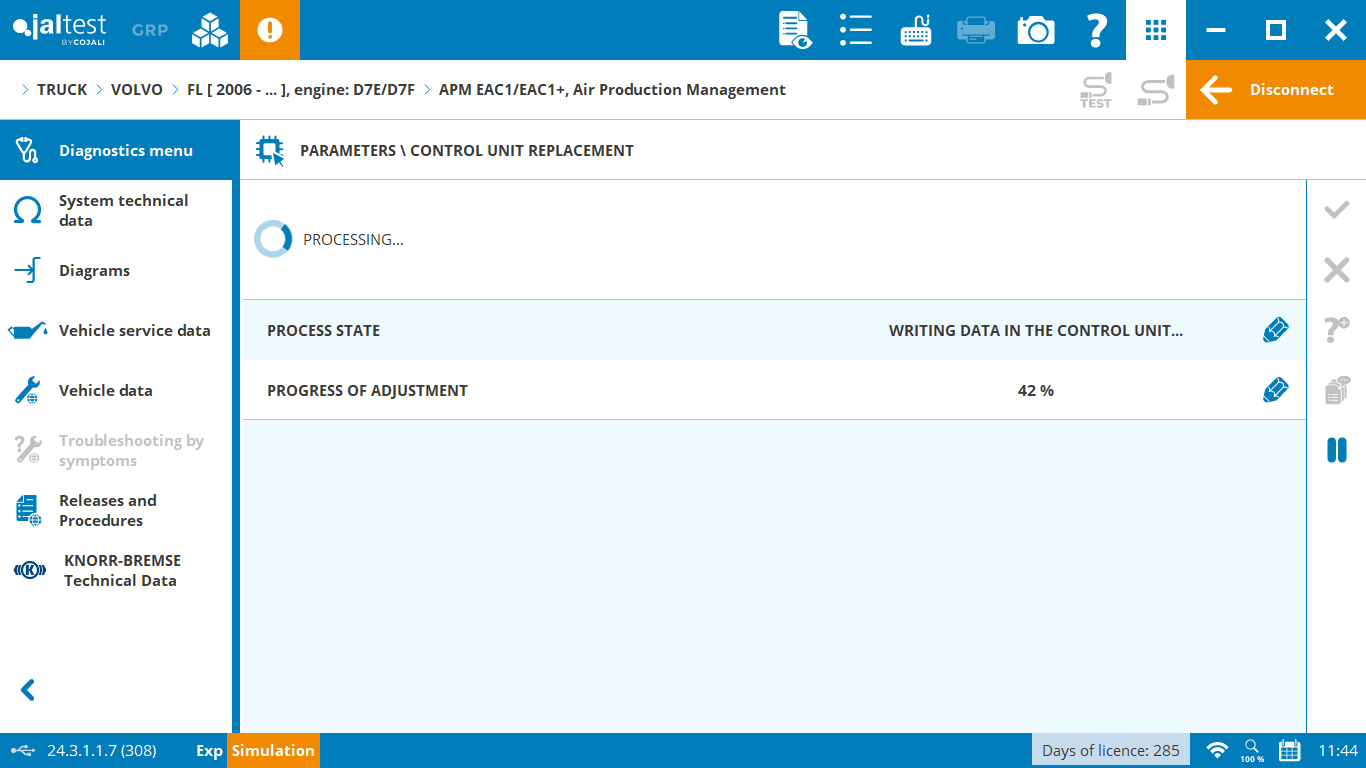
- It will then read the data off of the existing control unit.
- After it’s finished. Follow on-screen instructions. Turn off the ignition, change the component and then turn the ignition back on. After this, click the “tick icon”.
- It will then write the data to the new control unit.
- Process finished. Your new EAC module has now been programmed.
Order Today at Eclipse
Programming a Knorr-Bremse EAC+ system doesn’t have to be complex—as long as you’re using the right tools. The Knorr-Bremse Diagnostics add-on for Jaltest ensures reliable, safe programming aligned with manufacturer standards. Whether you’re a commercial fleet technician or a workshop owner, adding this to your diagnostic arsenal is essential for working with modern Volvo and Renault air systems.
Need access to the add-on or help with setup? Contact Eclipse today via our Contact Form or call us on 03454 66 66 99.
Eclipse are proud to be the UKs official distributor of Jaltest diagnostics, and when purchasing diagnostic products from us, our customers receive a fully dedicated telephone technical support service that is second to none.